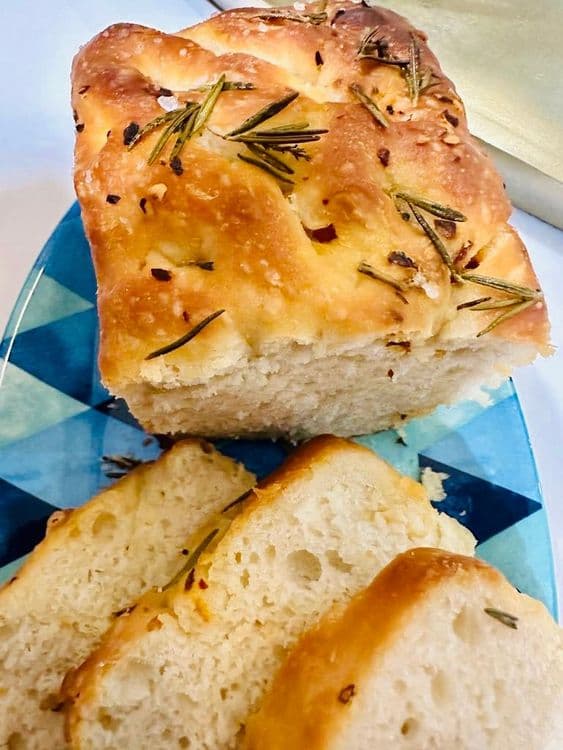
Rosemary & Garlic Focaccia is a delightful Italian creation that boasts a spongy, crispy, and airy texture with a golden crust and soft interior bread. Infused with the irresistible flavours of rosemary, garlic, and a touch of chilli flakes, this bread is perfect for casual get-togethers, lazy Sunday afternoons, or simply when you crave a flavorful snack.
Chefadora AI has the answer - timers, swaps, step-by-step help.
In a small bowl, dissolve the dry yeast in warm water and let it sit for 5 minutes until it becomes frothy.
Whisk together the flour, salt, and milk powder in a large mixing bowl.
Make a well in the centre of the flour mixture and pour in the yeast mixture and olive oil (5 tbsp). Mix well until the dough comes together. Knead the dough gently about 10-12 times until it becomes smooth and elastic.
Cover the dough in a greased bowl with a clean kitchen towel. Place it in a warm area and let it rise for about 1 hour or until it doubles in size.
Preheat your oven to 200°C (400°F).
Add the chopped garlic to the dough and gently mix it with a dough cutter.
Grease a baking pan or a foil tray with 2 tbsp of olive oil.
Place the dough in the foil tray and roll it in the olive oil. Press it down to fit in the tray. Use your fingers tips to create dimples all over the surface of the dough.
Sprinkle the chilli flakes, and sea salt evenly over the dough. Arrange the rosemary leaves on top. Drizzle a tbsp of olive oil over the dough and gently create dimples over the surface.
Bake the focaccia in the preheated oven for about 20-25 minutes, or until it turns golden brown on top.
Once baked, remove the focaccia from the oven and let it cool for a few minutes.
Slice or cut in squares and serve warm.
When kneading the dough, use light hands and avoid adding too much additional flour. Over-kneading or adding too much flour can result in dense and dry focaccia.
Olive oil both in the bottom of the pan and on top of the dough is essential for encouraging nice browning and flavour.
Feel free to experiment with other herbs and spices.
Keep an eye on the focaccia while it's baking, as ovens can vary. Start checking for doneness around the 20-minute mark.
You can cut the focaccia into smaller squares or larger slices, depending on how you plan to serve it.
You can serve it as an appetizer, side dish, or part of a meal.
How do I make Rosemary & Garlic Focaccia from scratch?
To make Rosemary & Garlic Focaccia from scratch, start by dissolving dry yeast in warm water and letting it froth. Then, mix all-purpose flour, salt, and milk powder in a bowl. Combine the yeast mixture and olive oil with the dry ingredients, knead the dough until smooth, and let it rise until doubled in size. After that, incorporate chopped garlic, shape the dough in a greased pan, add toppings like rosemary and chilli flakes, and bake at 200°C (400°F) for 20-25 minutes until golden brown.
Is Rosemary & Garlic Focaccia suitable for a vegan diet?
Yes, Rosemary & Garlic Focaccia can easily be made vegan by omitting the milk powder or substituting it with a plant-based alternative. The rest of the ingredients, including flour, yeast, olive oil, and seasonings, are naturally vegan-friendly.
What can I substitute for all-purpose flour in this focaccia recipe?
If you're looking for a gluten-free option, you can substitute all-purpose flour with a gluten-free flour blend. Alternatively, bread flour can be used for a chewier texture. Just ensure that any substitutions maintain the right consistency for the dough.
How should I store leftover Rosemary & Garlic Focaccia?
To store leftover Rosemary & Garlic Focaccia, let it cool completely, then wrap it tightly in plastic wrap or aluminum foil. You can keep it at room temperature for up to 2 days or refrigerate it for up to a week. For longer storage, consider freezing it; just slice it first for easy thawing.
What dishes pair well with Rosemary & Garlic Focaccia?
Rosemary & Garlic Focaccia pairs wonderfully with a variety of dishes. It complements soups, salads, and pasta dishes beautifully. You can also serve it with olive oil and balsamic vinegar for dipping or enjoy it alongside charcuterie boards and cheese platters.
Elevate your confidence through the magic of home cooking with my easy-to-follow recipes 👩🍳✨
